Getting Started with CodeGlide
Continuous Migration of API to Secure MCP Servers at Scale
Experience seamless automation from code to production with enterprise-grade security and scalability built-in.
CodeGlide.AI
Connect your development workflow
GitHub authentication
Secure credential authentication
Analyze and Generate
Automated repository analysis and MCP server generation
Security Scan
Automated secrets scans and security checks
Secure MCP Servers
Ready-to-deploy MCP tools
GitHub PR
Automated pull request creation
Prerequisites
All you need
A GitHub repository containing your API code with route definitions or OpenAPI specifications.
Get Started
Generate MCP ServerFollow these four steps to transform your API into an MCP server in minutes.
Want to understand how CodeGlide works? Read the Introduction
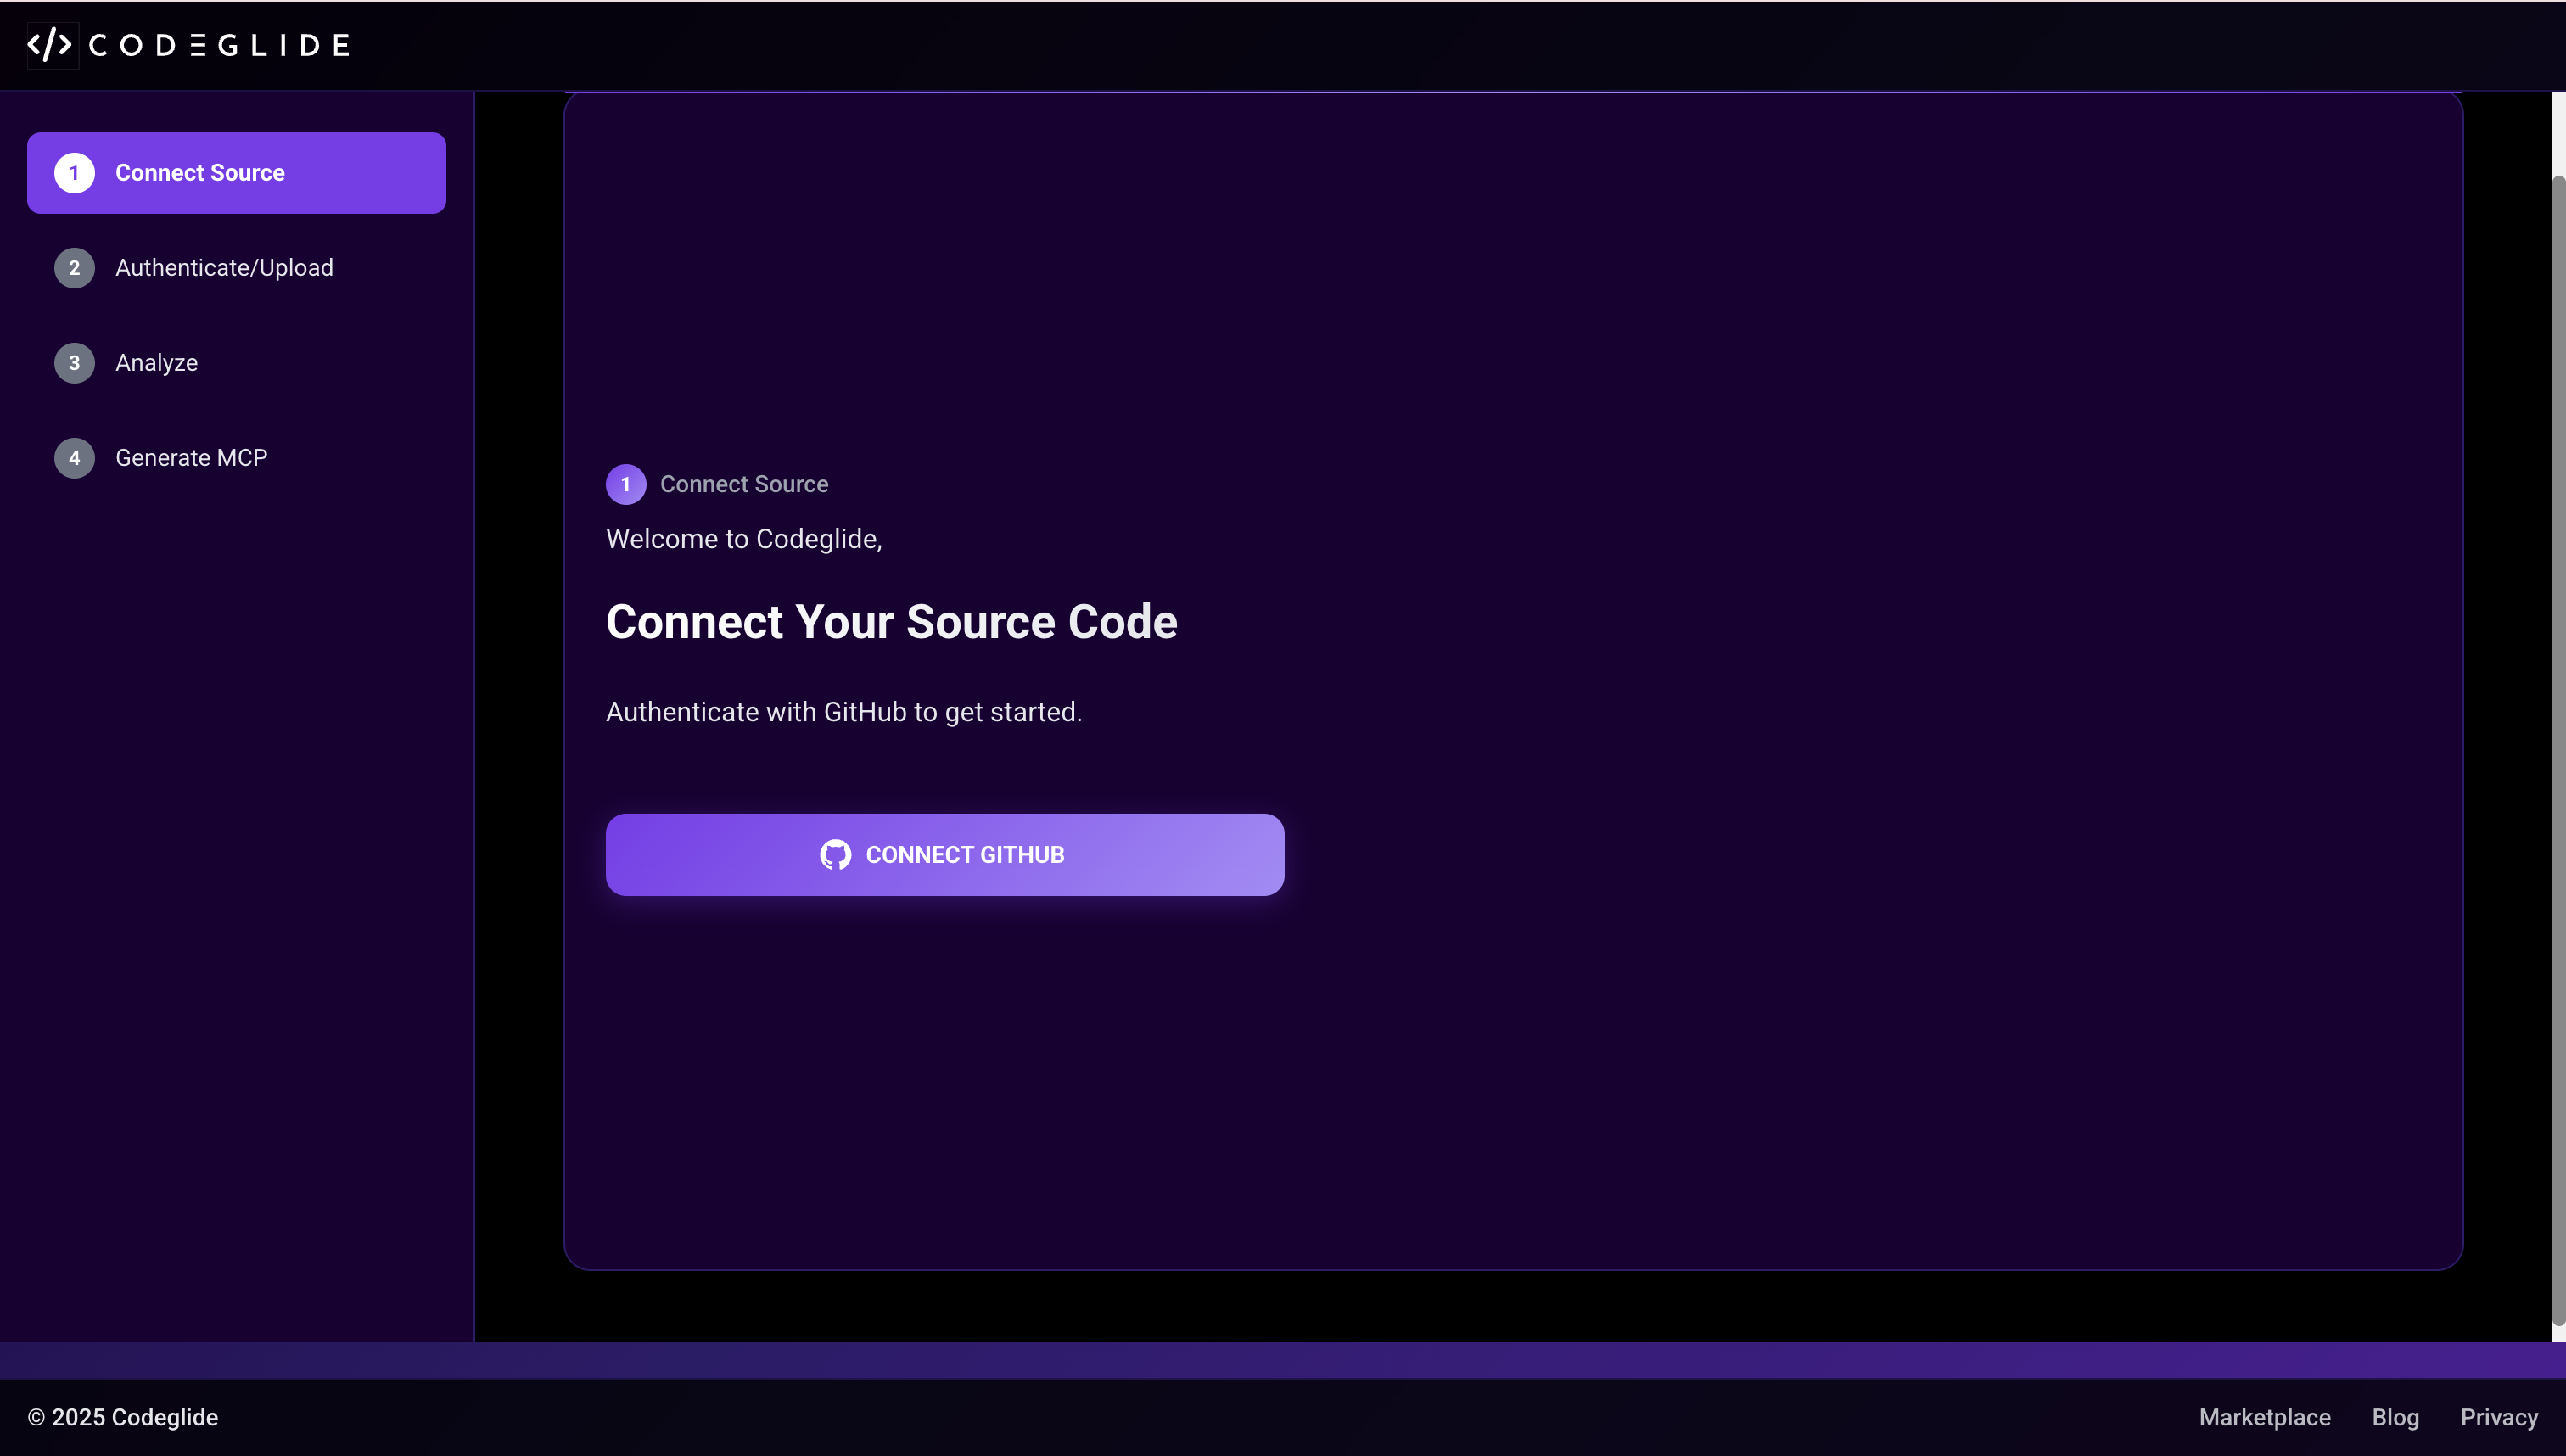
Connect to Your API Source Code
Establish a secure connection to your API's source repository through GitHub authentication.
1.1 Click on Connect GitHub
Initiate the connection process by clicking the "Connect GitHub" button on the CodeGlide dashboard.
1.2 Authenticate to Your GitHub Account
Complete the secure GitHub authentication process to establish a trusted connection between CodeGlide and your account.
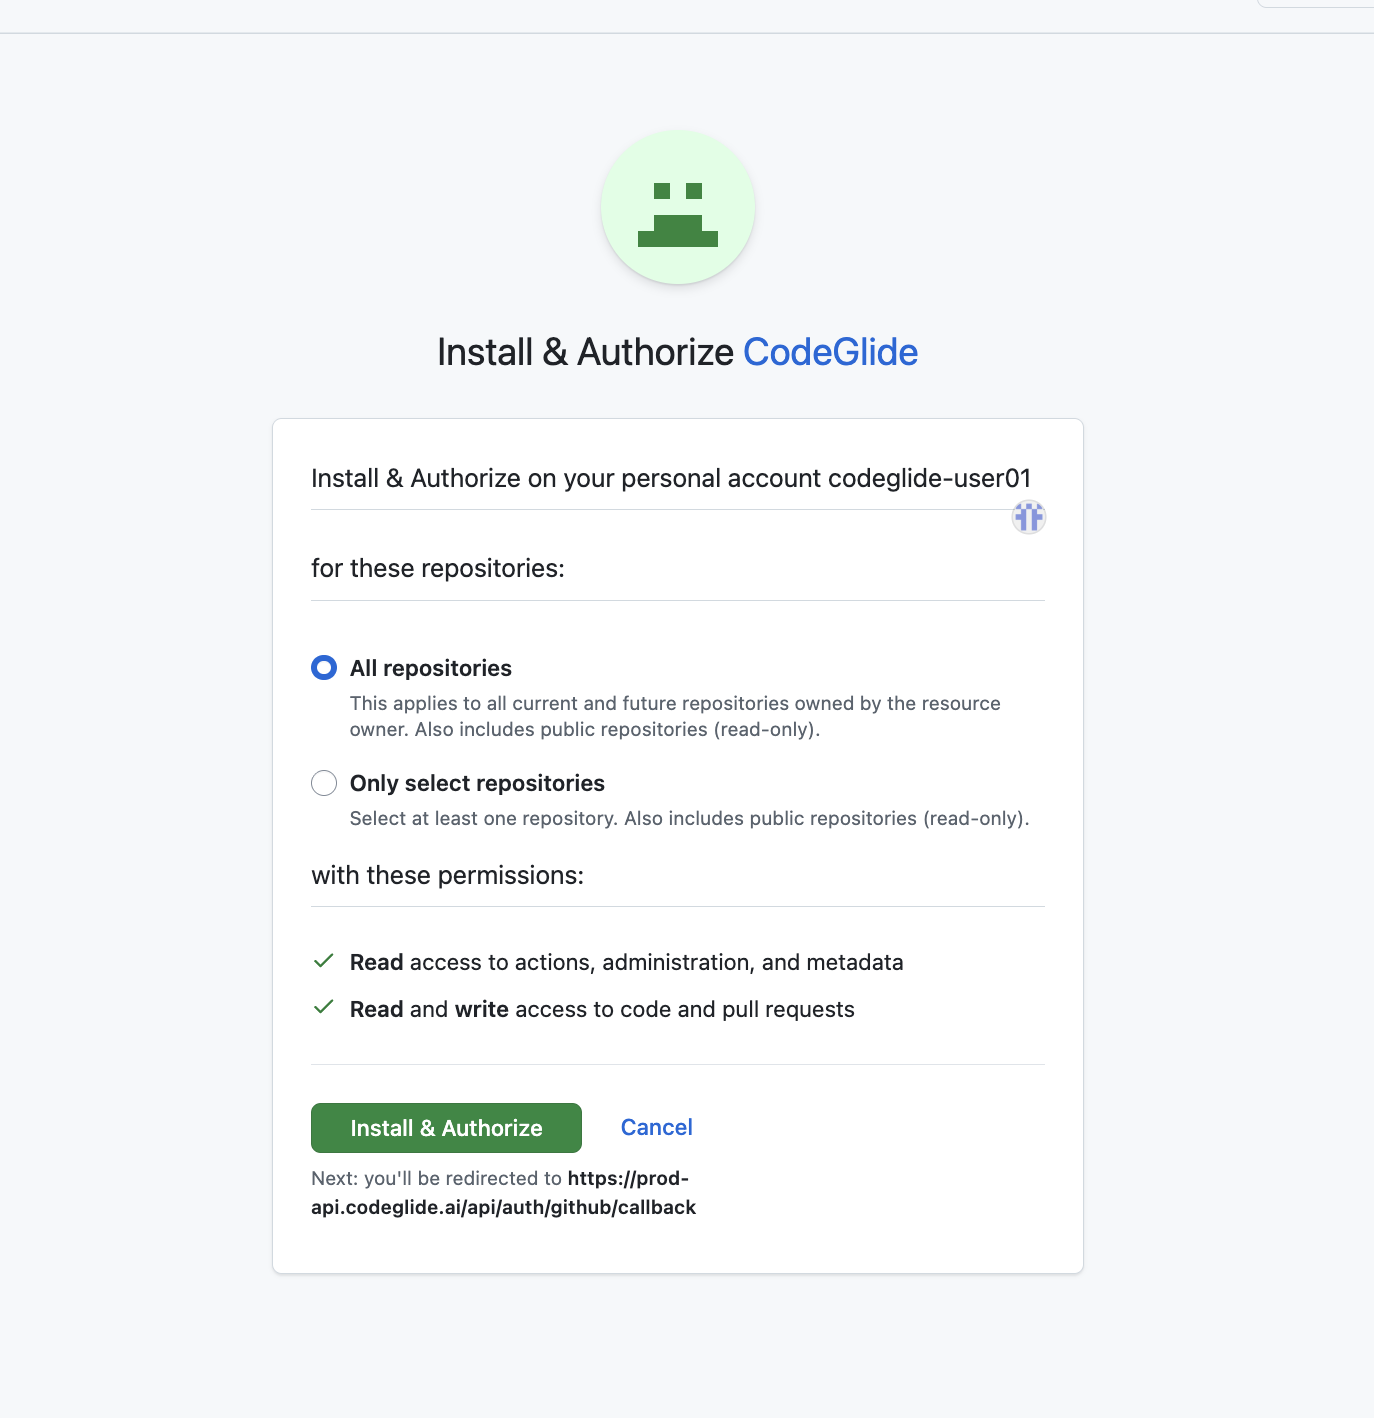
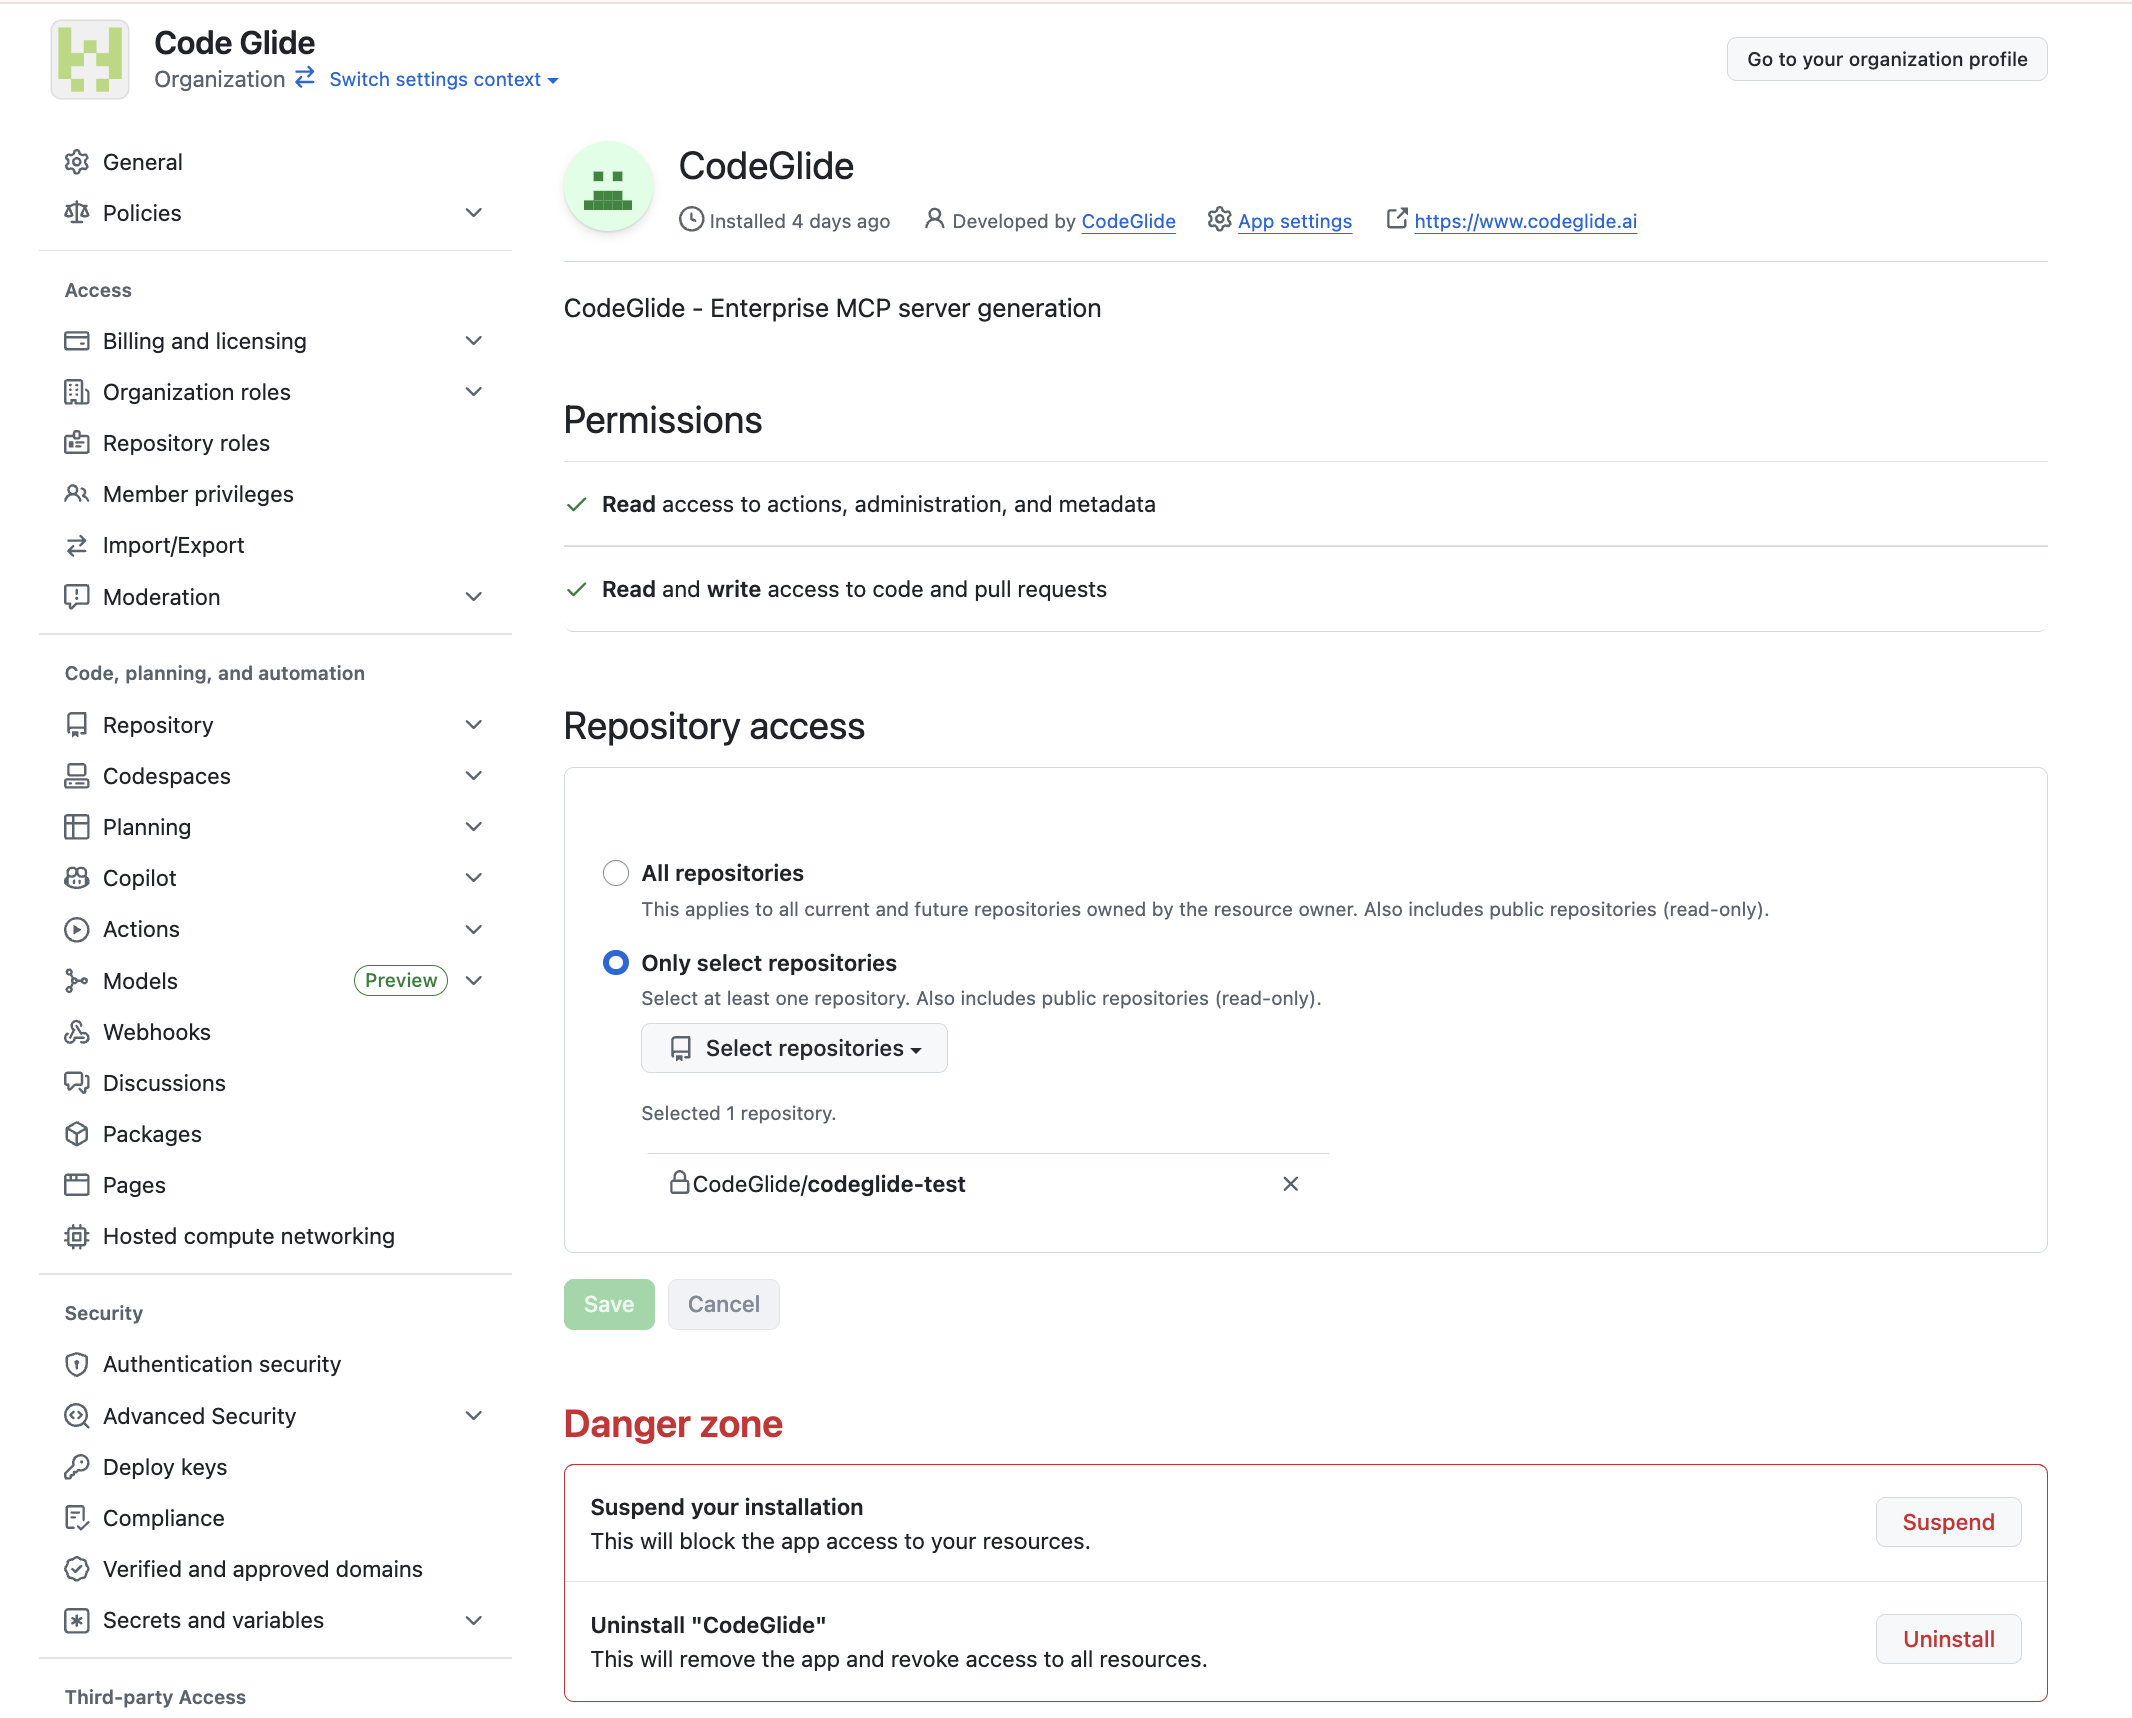
1.3 Configure Repository Access
Choose your preferred access level: grant access to all repositories or select specific repositories for which MCP generation is needed and you want to permit CodeGlide access.
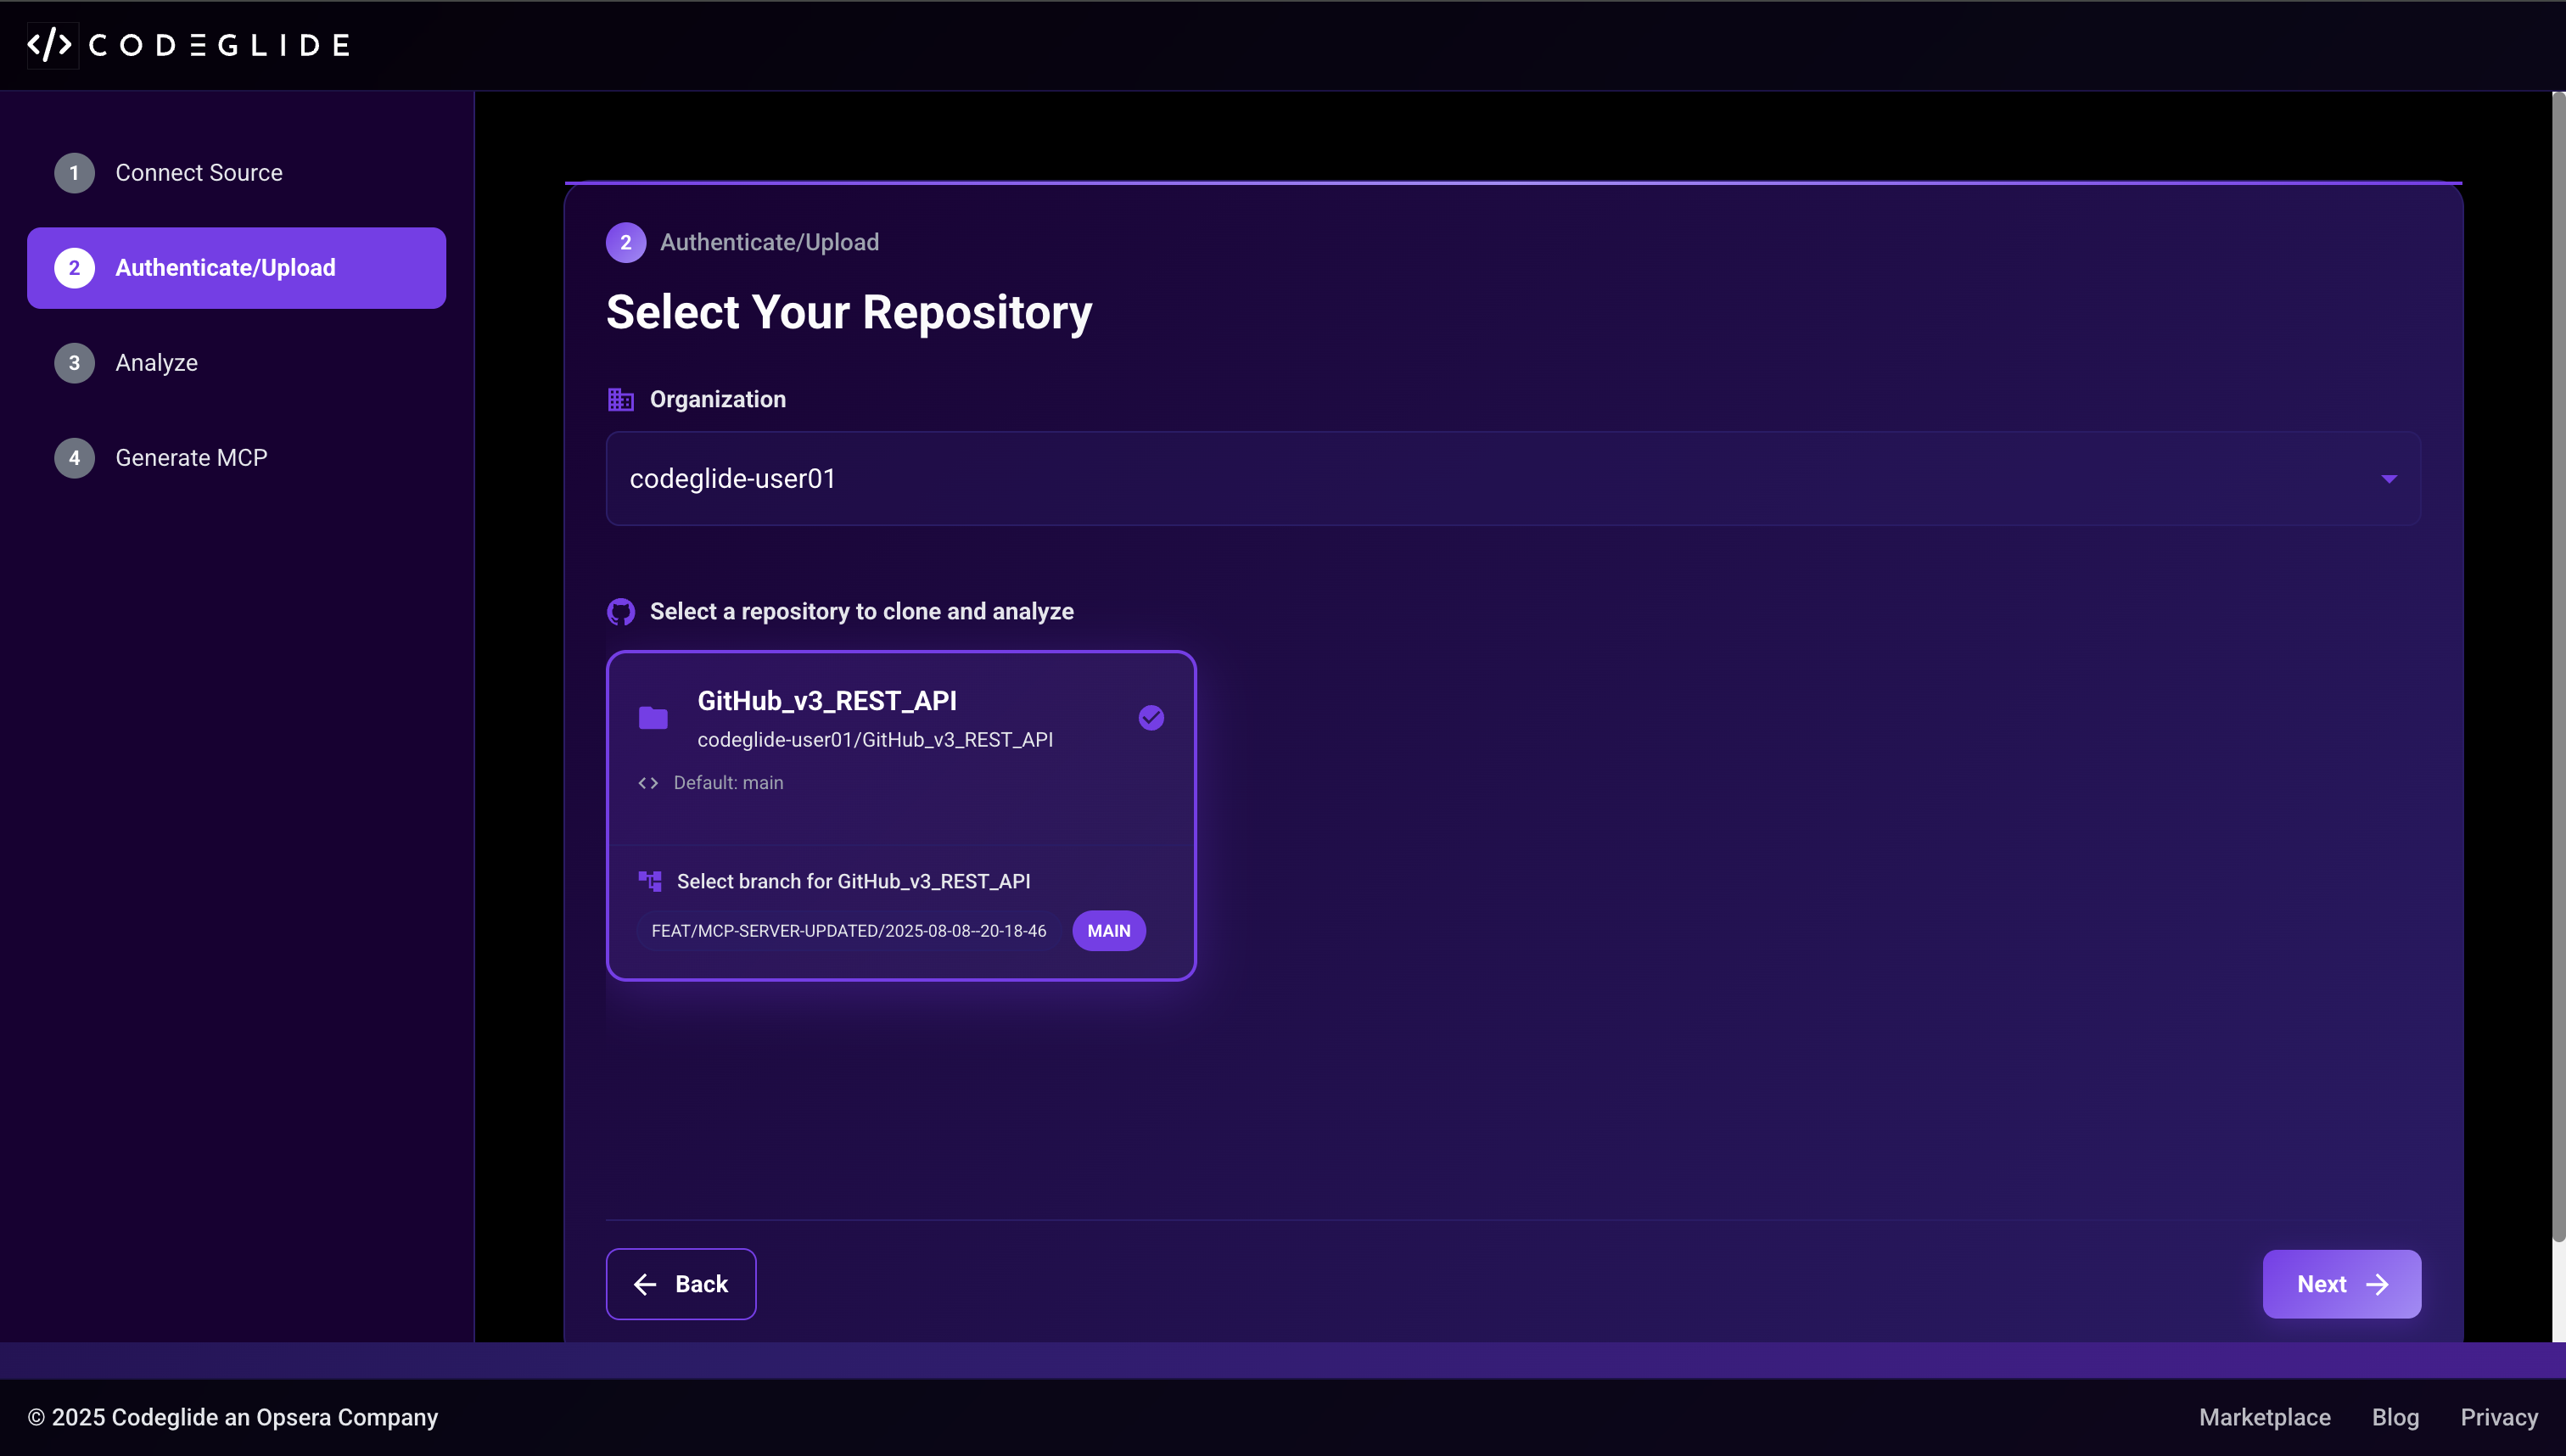
Select Your Repository
After authentication, choose your organization, repository, and branch to proceed with MCP generation.
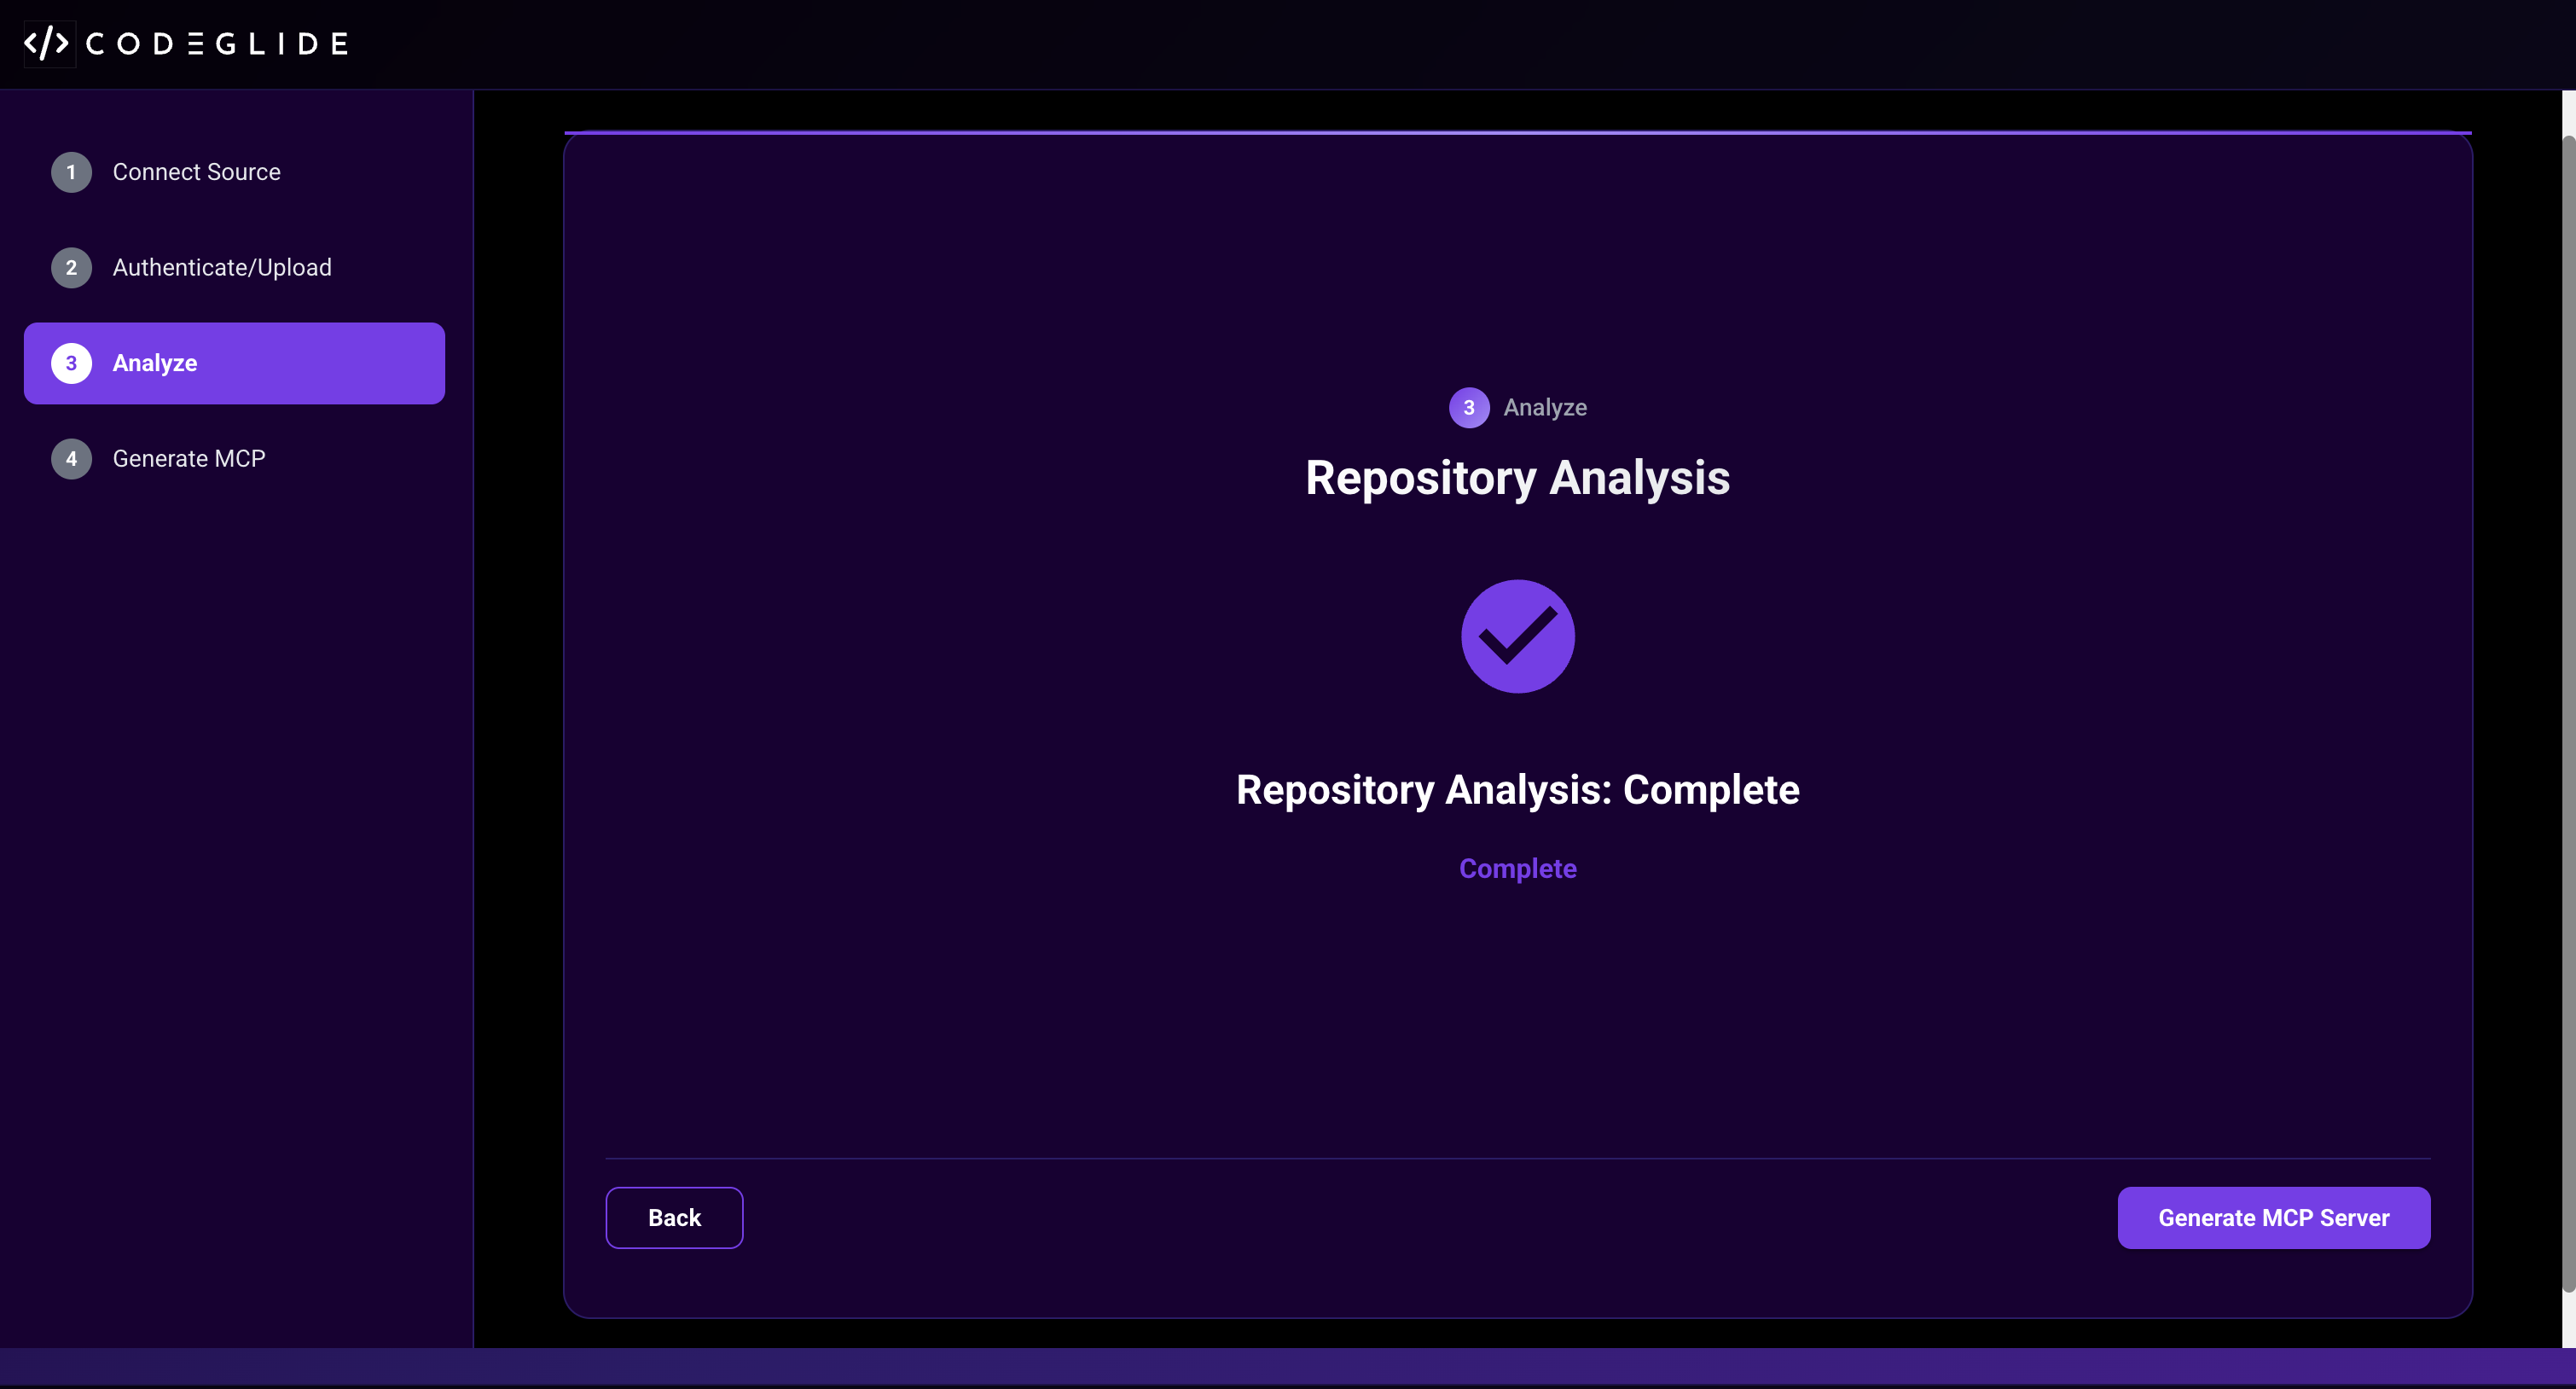
Repository Analysis
CodeGlide checks if an MCP server already exists and validates the repository structure.
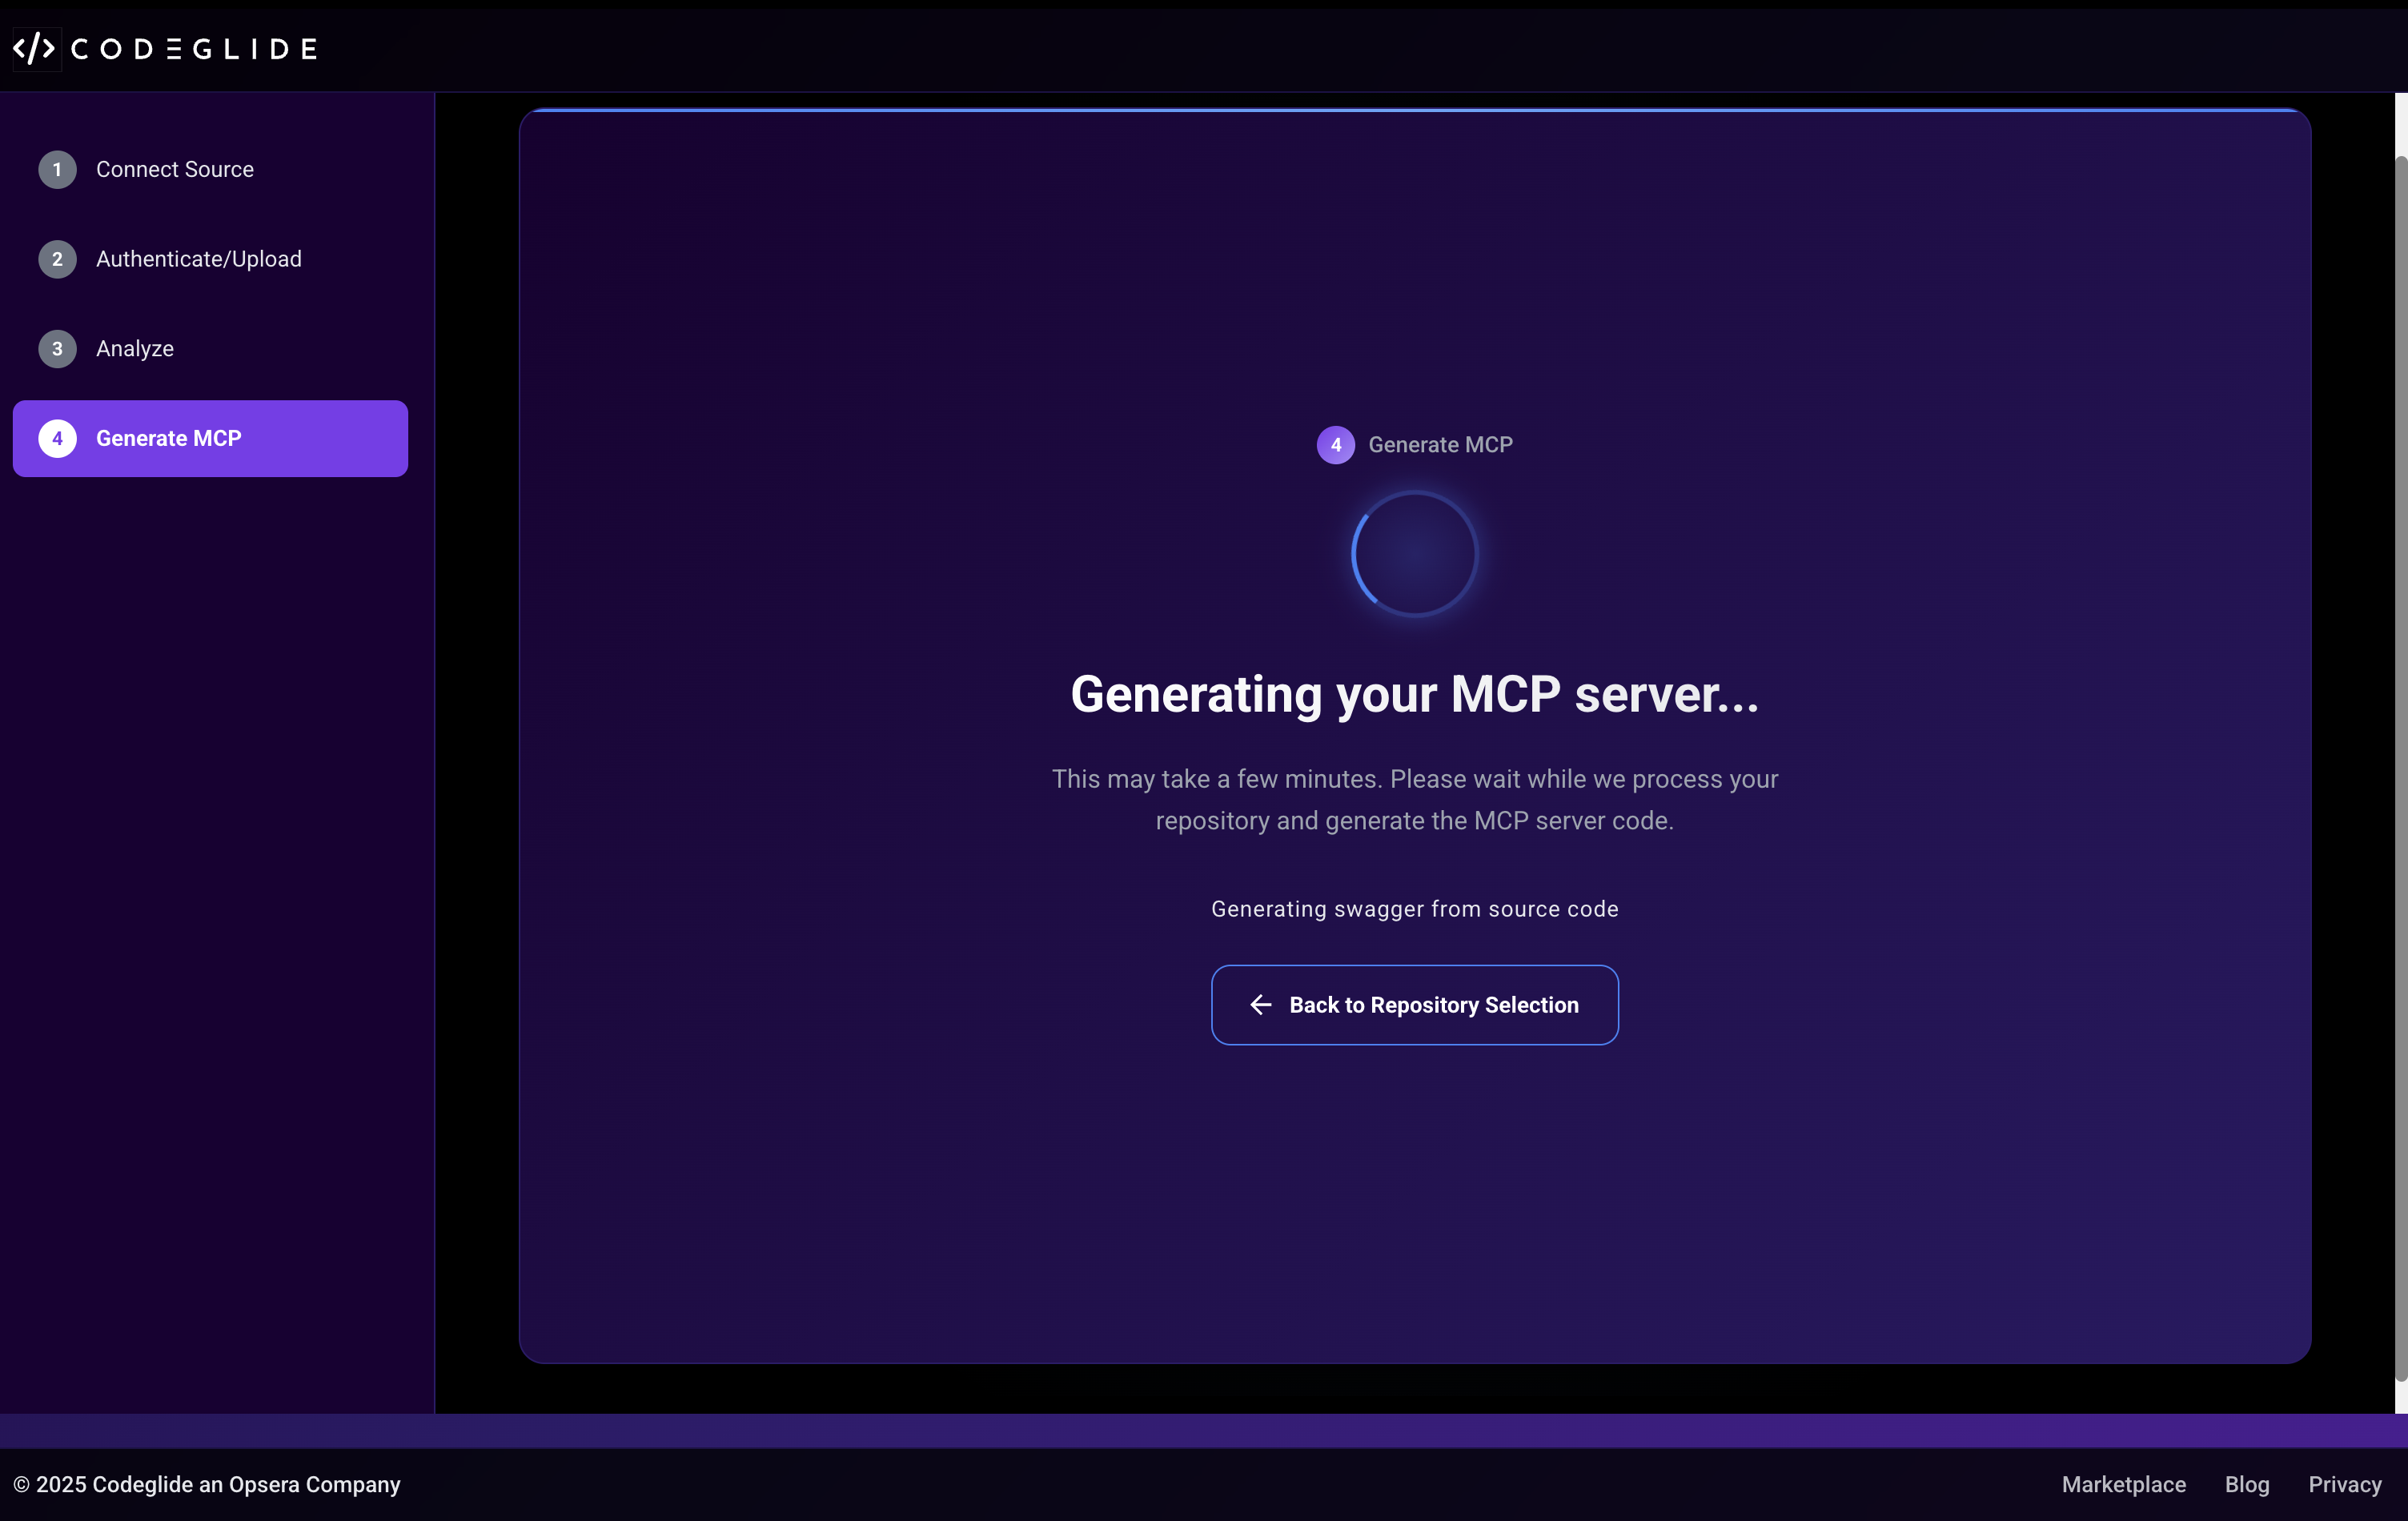
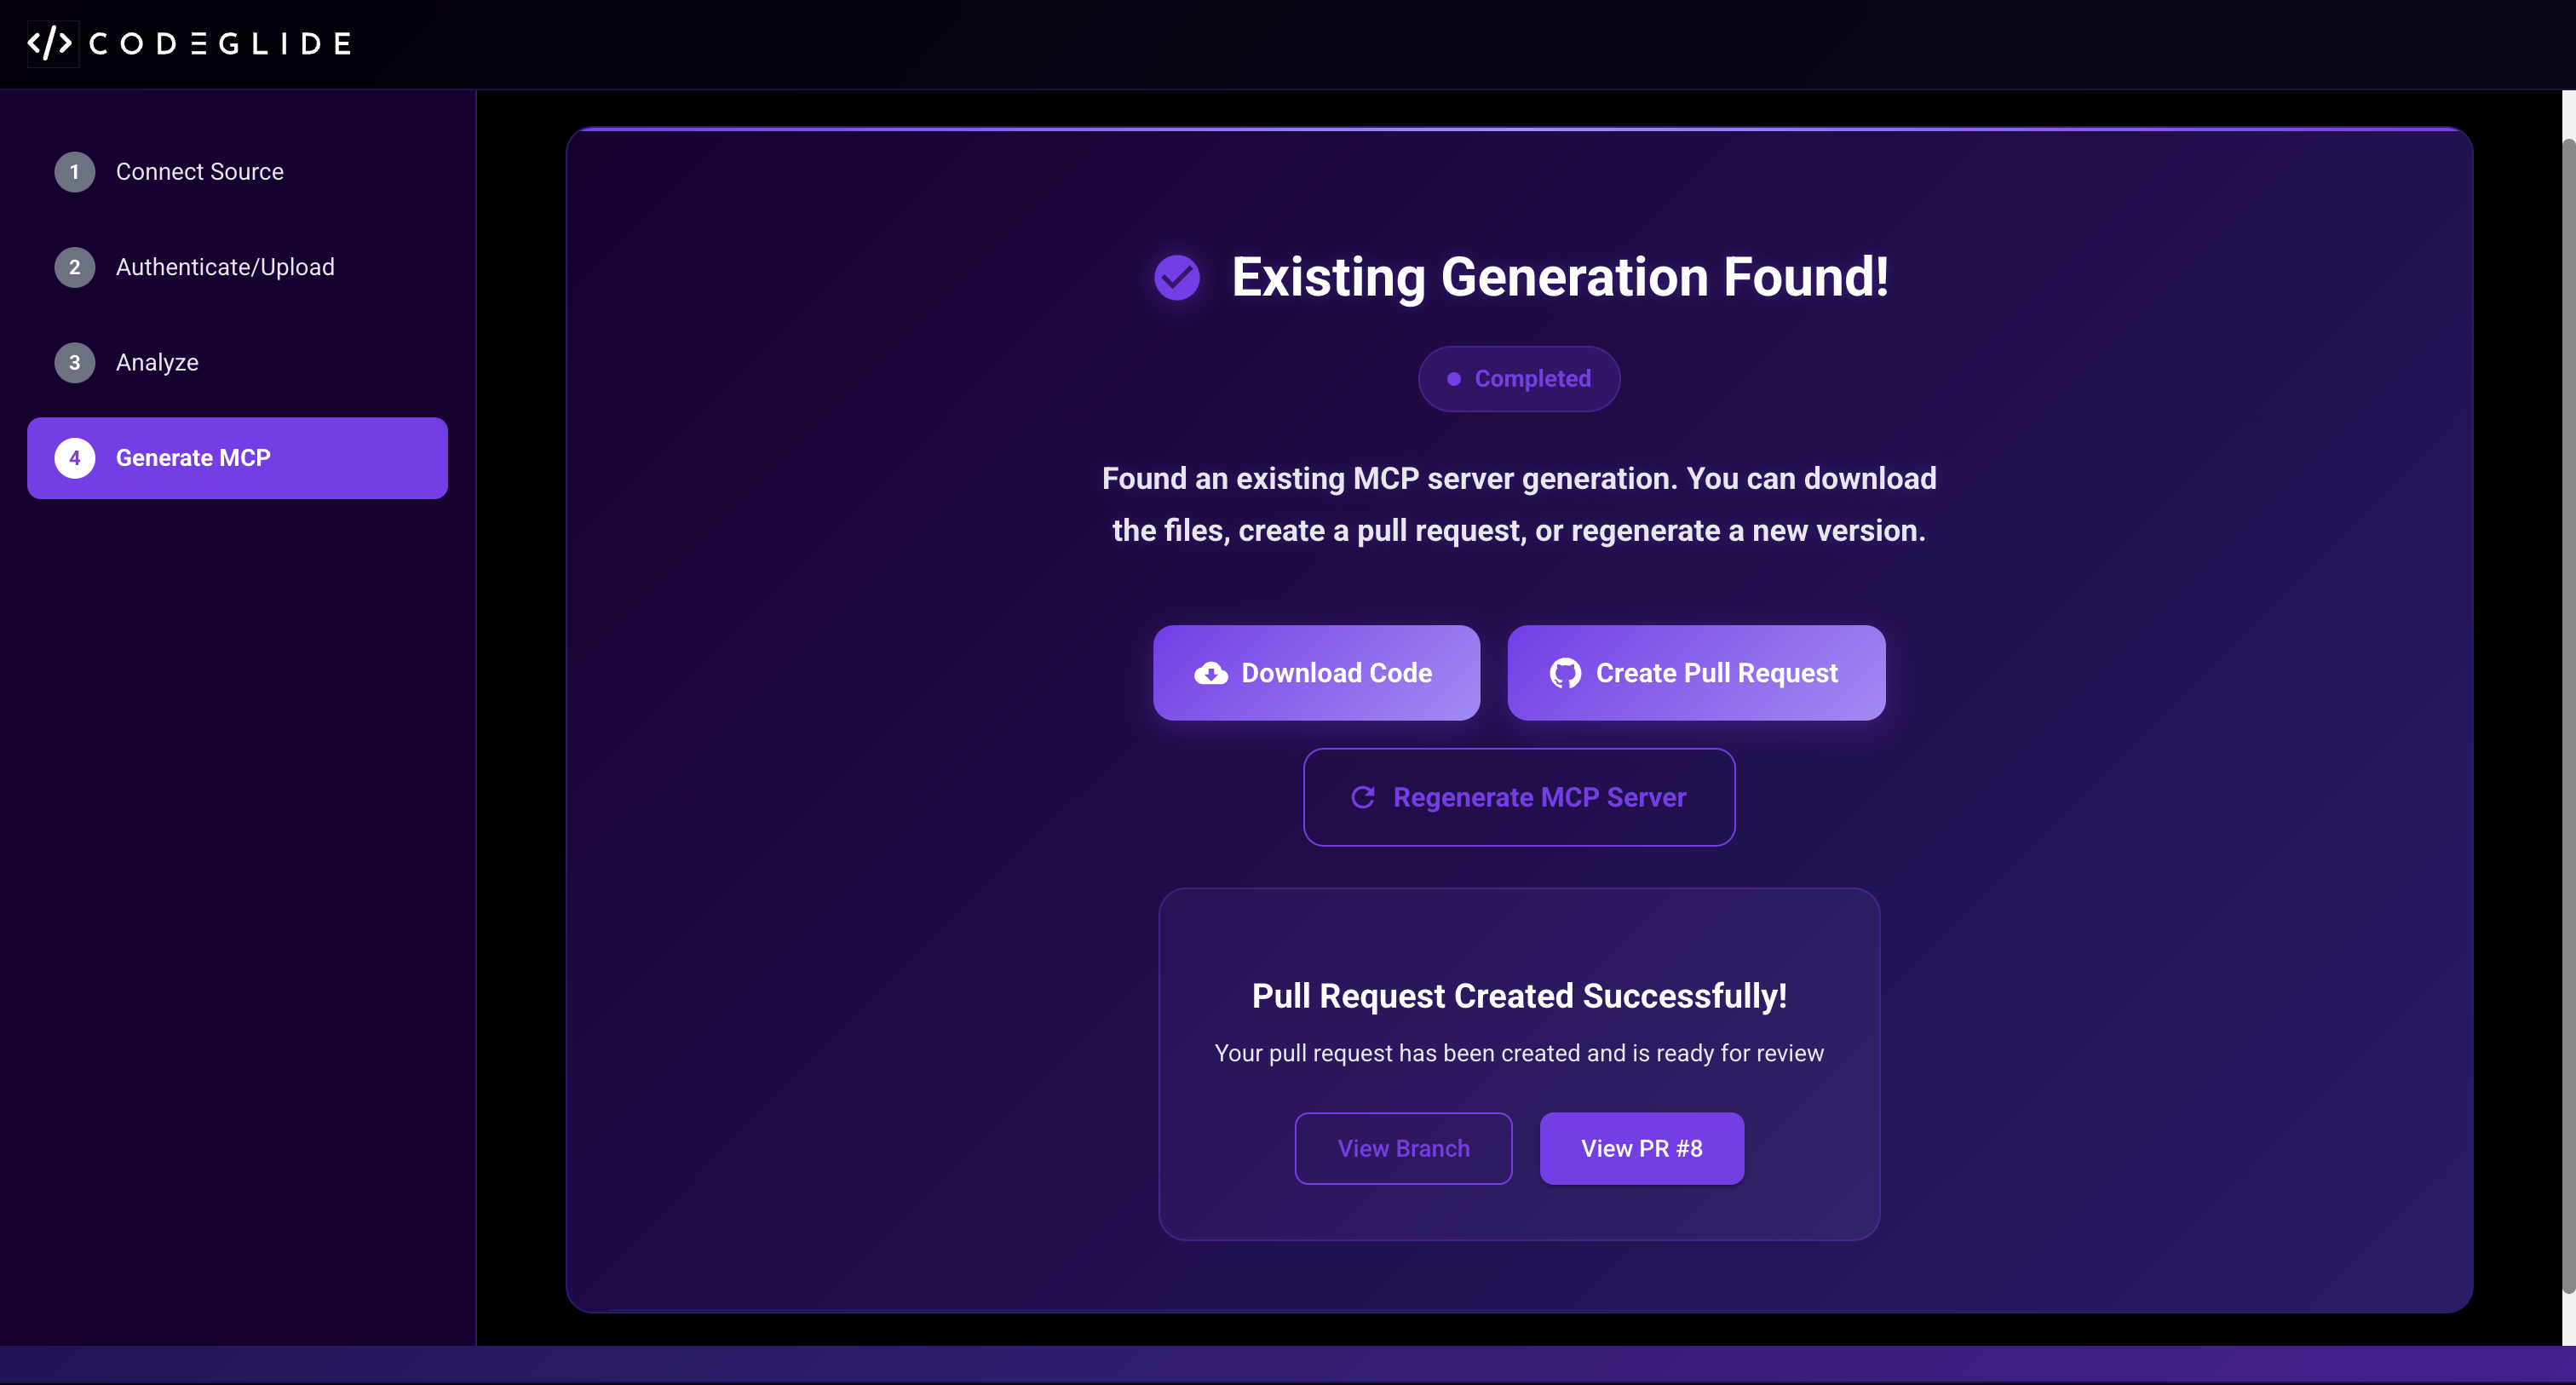
Generate MCP Server
⏳ MCP generation typically takes 2-5 minutes. While generation is in progress, you can monitor the progress statuses in the dashboard.
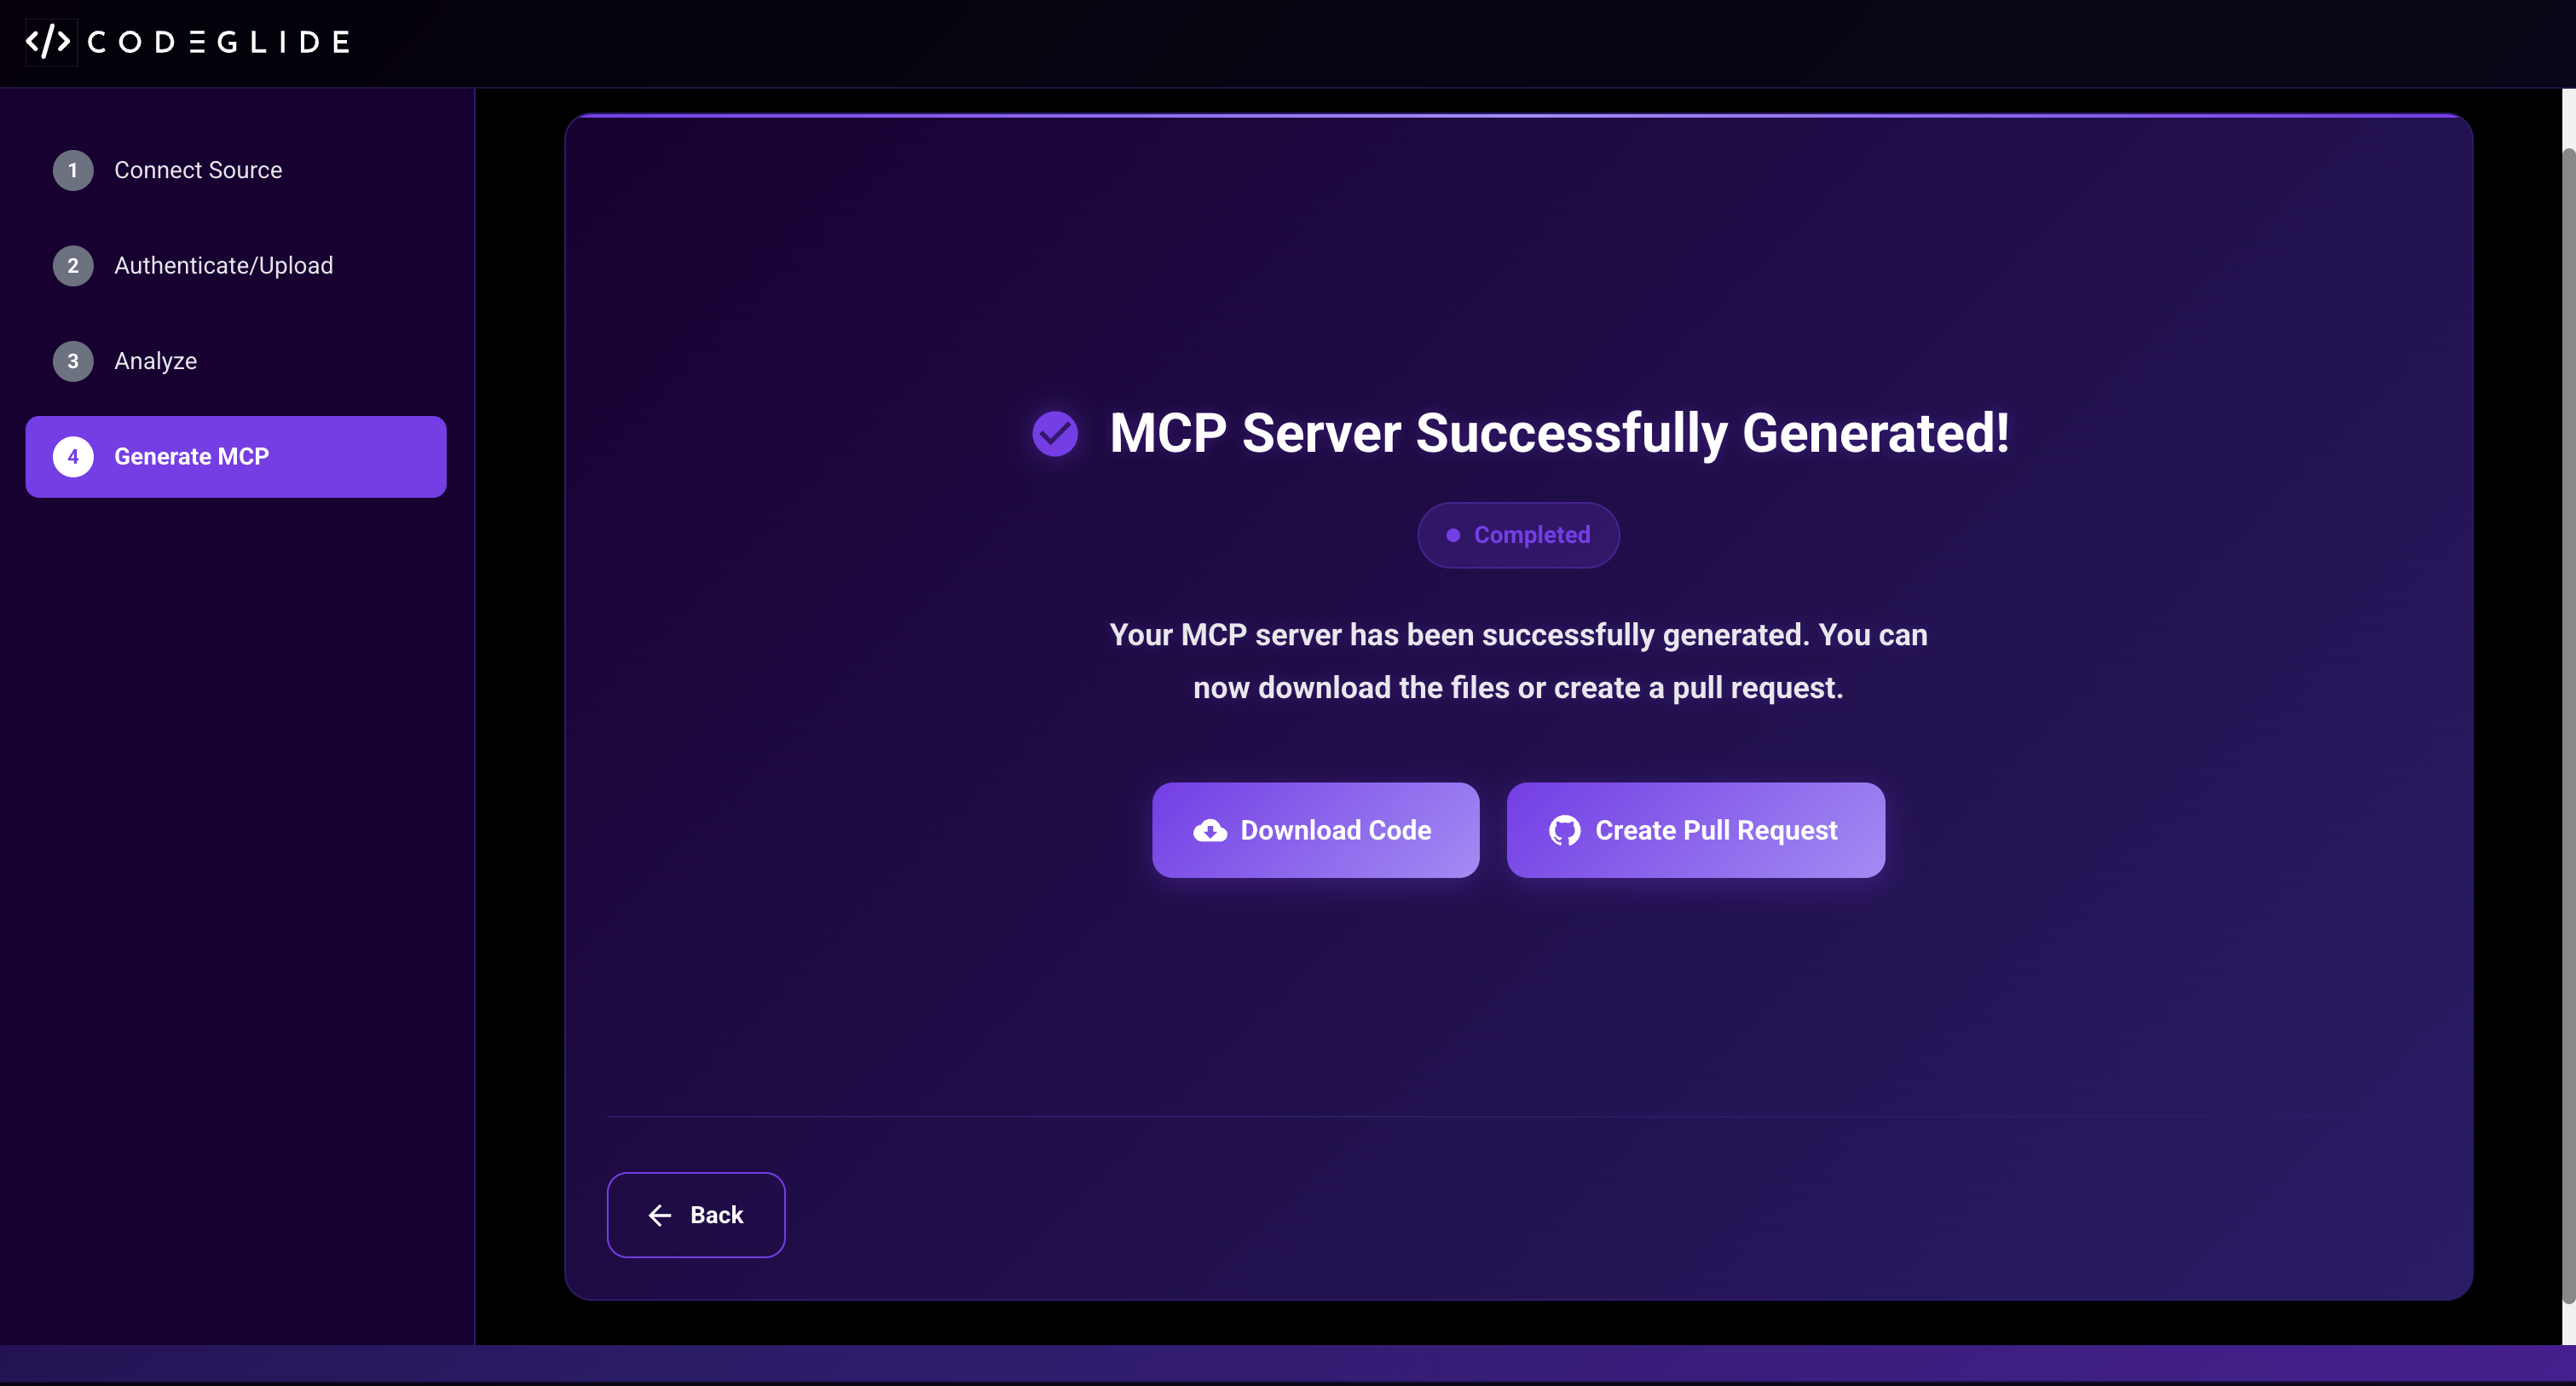
Once generation is completed, the system will display a success message with options to download your MCP server or create a pull request.
CodeGlide automatically checks if an MCP server already exists and allows you to download or regenerate as needed.
To integrate the generated MCP server with your repository, click the "Create Pull Request" button. This will create a new branch with your MCP server code.
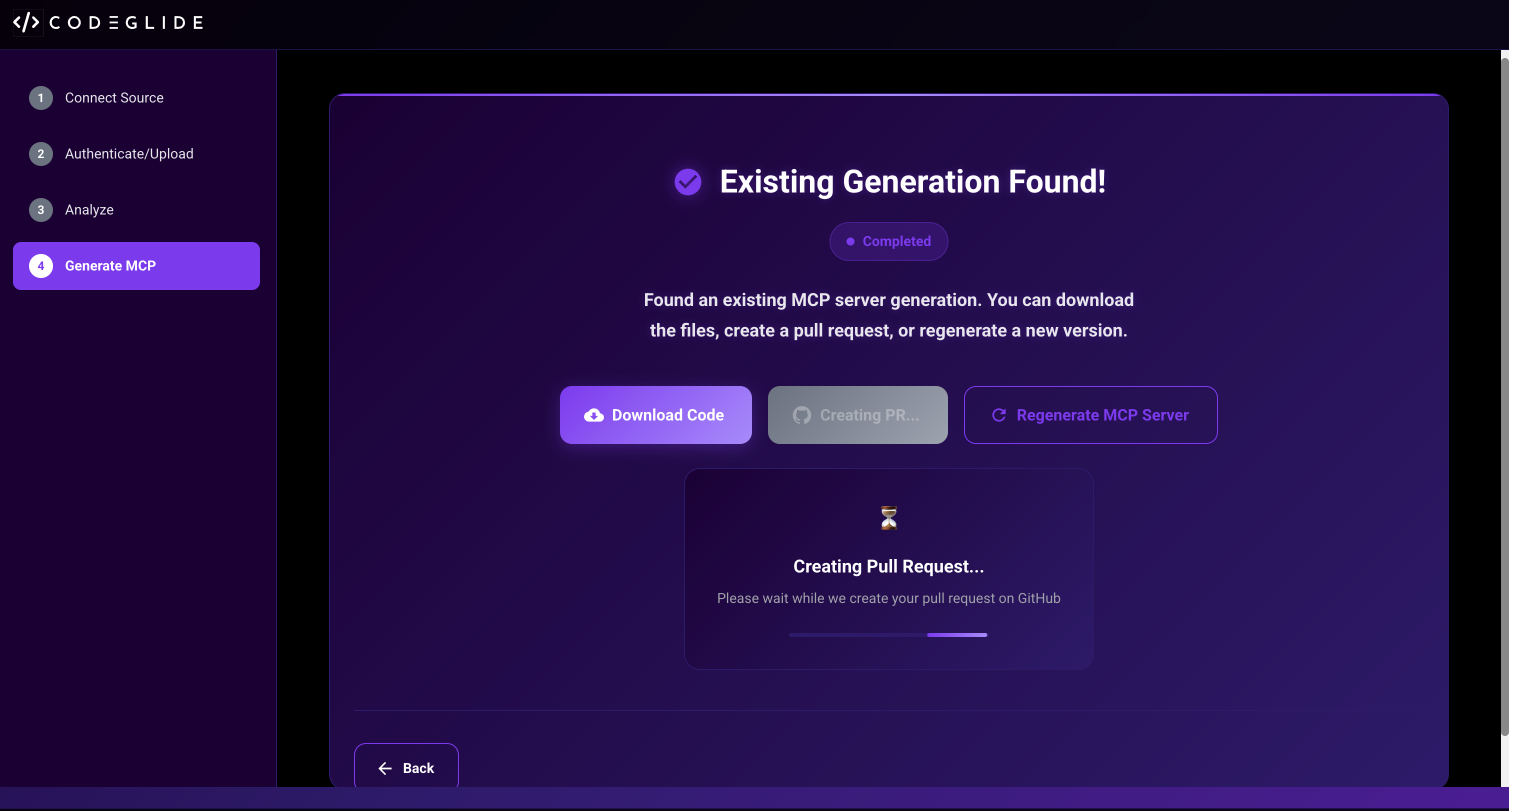
You can then view the new branch or pull request in your GitHub repository to review the changes before merging.
Facing Issues?
If you encounter any problems during setup or deployment, refer to our comprehensive troubleshooting guide for detailed solutions and fix instructions.
View Troubleshooting GuideDeploy MCP Server
Generated MCP Server Structure
The generated MCP server will have the following directory structure:
mcp-server/

├── registry.go
├── go.sum
├── tools/
├── config/
├── models/
├── README.md
├── go.mod
└── main.go
Configuration Instructions
Follow the configuration instructions provided in the README to set up your MCP server. The generated MCP server is typically usage-ready - generate the binary and configure it to your Agent or AI model to use the tools.
Example: Claude Desktop Configuration
Refer to the example MCP server configuration steps below to host in Claude Desktop:
# 1. Navigate to your MCP server directory
cd mcp-server

# 2. Install Go dependencies
go mod download

# 3. Configure server settings
# Edit config/ directory files as needed

# 4. Build and start the MCP server
go build -o mcp-server main.go
./mcp-server

# 5. In Claude Desktop, add MCP server:
# - Go to Settings > MCP Servers
# - Update mcp-server.json
# - Enable the server